


코드 포매터란?
코드 포매터(Code Formatter)란 정해진 규칙(코딩 컨벤션)에 맞추어서 코드를 정렬하는 도구를 말합니다. 많은 기업들에서는 정해진 코딩 스타일과 컨벤션이 있는데, 이에 맞추어서 자동으로 코드를 정렬하거나, 혹은 보기 좋게 꾸밀 수 있습니다.
코딩 스타일을 따르는 것은 매우 중요합니다. 코드는 쓰는 횟수보다 읽는 횟수가 훨씬 더 많으므로, 코드는 가독성을 위해서 최대한 보기 좋게 작성되어야 합니다.
코딩 스타일은 코드의 가독성을 높이는데 아주 중요한 ‘약속’입니다. 예를 들어 어떤 팀 내에서 띄어쓰기 간격을 4칸으로 하는 것에 대해 정했으면, 모든 팀원이 이에 따라야 합니다. 만약에 어느 한 팀원이 띄어쓰기 간격을 두 칸으로 해놓는다면, 보는 이로 하여금 통일되지 않은 코딩 스타일로 인해서 코드를 읽는데 큰 불편함을 느끼게 될 것입니다.
이러한 작업을 도와주는 것이 코드 포매터입니다.
코드 포매터를 써야 하는 이유
이전에, 다른 분이 코딩을 하는 모습을 옆에서 보고 충격을 먹은 적이 있습니다. 협업을 하는데, 코딩 컨벤션을 지키지 않아서 PR 제출이 거부되었다는 것입니다. 그래서 코딩 컨벤션을 지키려고 함수와 함수 사이에 줄 간격을 하나하나 고치는 것을 보고 충격을 먹었습니다.
코딩 스타일을 지키는 것은 매우 중요하지만, 이를 개인이 직접 하나하나 관리하는 것은 고역이고 엄청난 시간 낭비입니다. 사람들은 단순한 반복에 불가한 이 작업을 최대한 줄이고, 프로그래머가 순수히 코드의 로직을 생각하고 표현하는데 집중하도록 코드 포매팅을 자동화하는 도구를 만들어냈습니다.
위의 상황에서 저는 코드 포매터를 쓰라고 이야기해주었지만 잔소리 정도로밖에 듣지 않더군요.
이들이 해야 할 것은 시간을 들여서 정성스럽게 한 줄 한 줄 코드를 포매팅하는데 시간을 낭비하는 것이 아니라, 코드 포매터를 설치하고, 설정을 바꾸어서 원하는 코드 포맷 세팅을 만들어내야 했습니다. 그렇게 되면 장기적으로, 버튼 한 번, 혹은 명령어 한 번으로 전체 프로젝트 모든 파일들의 코드 포맷을 순식간에 완료할 수 있었을 것입니다.
현대적인 협업을 따를 때 이 코드 포매터를 사용하지 않는 것은 말이 안 됩니다. 개개인이 하나하나 코딩 컨벤션에 맞추어서 지루하게 줄 간격을 조정하고, 띄어쓰기 간격을 조정하는 비생산적인 시간을 최대한 줄여야 합니다. 또한, 한 사람이 하나의 프로젝트만 진행하는 것이 아닙니다. 만약에 여러 프로젝트를 동시에 진행하는 경우, 개별 프로젝트들의 코딩 컨벤션이 모두 다르다면, 사람이 직접 이를 신경써가면서 작성하는 것은 분명 어디선가 실수를 유발할 것입니다.
그렇기 때문에 다양한 코드 포매터가 발전하게 되었고, 이 글에서는 각 언어별 코드 포매터를 소개합니다.
코드 포맷
협업을 할 때는, 실제 코드가 작성되기 전 어떠한 코드 포맷을 사용해야 할 지 정해야 합니다. 물론 각 팀의 컨벤션에 맞추어서 이를 직접 정의할 수도 있겠지만, 만약에 그런 게 없을경우, 다른 기업들의 코딩 컨벤션을 따르는 것도 좋은 방법입니다.
예를 들어 C/C++의 경우는 마이크로소프트, 구글, LLVM이나 크로미움 등 주요한 기업 혹은 단체에서 자신들만의 코딩 스타일을 갖고 있고, 이를 외부에서도 사용할 수 있도록 공개하고 있습니다.
Python의 경우, PEP-8이라는, 파이썬 재단이 직접 관리하는 코딩 스타일이 존재합니다. PEP-8 외에도 각 기업들마다 코딩 스타일을 정의하는 경우도 있습니다. 구글의 경우는 Google Python Style Guide를 별도로 만들고 관리하고 있습니다.
Go, Dart 언어 등 현대적인 언어의 경우는, 그 언어 자체에서 정의하는 코딩 스타일이 있기도 합니다. 만약에 언어가 자체적인 코딩 스타일 표준을 갖고 있을 경우, 개발자들은 어떤한 코딩 컨벤션을 따를 지, 혹은 스스로 만들지 고민하지 않아도 됩니다. 그냥 언어 자체가 제공하는 컨벤션에 맞추어서 코드를 작성할 수 있기 때문입니다.
통일된 코드 포맷이 주는 장점은, 언제 어딜가나 모두 동일한 형식으로 포매팅된 코드를 볼 수 있기 때문입니다. 그렇기 때문에 다른 곳의 코드를 읽는데 있어서 훨씬 안정감을 줍니다.
구글은 자체적으로 별도의 파이썬 코딩 스타일을 갖고 있었다고 말했는데요, 현재는 그렇지 않지만, 구글의 파이썬 코딩 스타일은 띄어쓰기를 2칸으로 규정해두고 있었습니다. 그러나 이는 4칸을 권장하는 PEP-8 스타일과 충돌하게 되었고, 이로 인해서 구글의 개발자들은 외부 오픈소스를 이용하는 데 있어서 달라진 코딩 스타일로 인해 불편함을 겪게 되었고, 외부의 오픈소스 개발자들 역시 구글의 코드를 이용하는 데 있어서 불편함을 겪게 되었습니다(관련 포스팅 링크).
이처럼 서로 다른 코드 포맷은 개발자들이 서로 다른 진영에 대해 쉽게 접근하지 못하도록 선을 긋기도 합니다. 그렇기 때문에 때로는 언어 자체로 코드 포맷을 제공하는 ‘자유의 제한’이 도움이 되기도 합니다.
코드 포매터와 코드 린터
코드 린터(Code Linter)에 대해서 정적 분석에 관한 글에서 소개한 적이 있습니다. 코드 포매터는 줄간격, 띄어쓰기 간격, 함수의 선언 스타일 등, 논리의 변경이 없고 코드 자체의 변경이 없는, 말 그대로 코드의 형식적인 부분에만 관여합니다.
반대로 코드 린터의 경우는, 실제 코드의 논리적인 부분에도 관여합니다. 코드 린터의 설정에 따라서 forEach 문이 아닌 for 문을 쓰도록 강제하거나, 사용하지 않는 변수에 대해서 경고하는 등의 역할이 코드 린터의 역할입니다. 둘이 비슷한 듯 다르지만, 서로 겹치는 영역이 많은 상호 보완적인 관계이고, 둘 다 사용해야 합니다.
각 언어별 코드 포매터
[C++] Clang-format

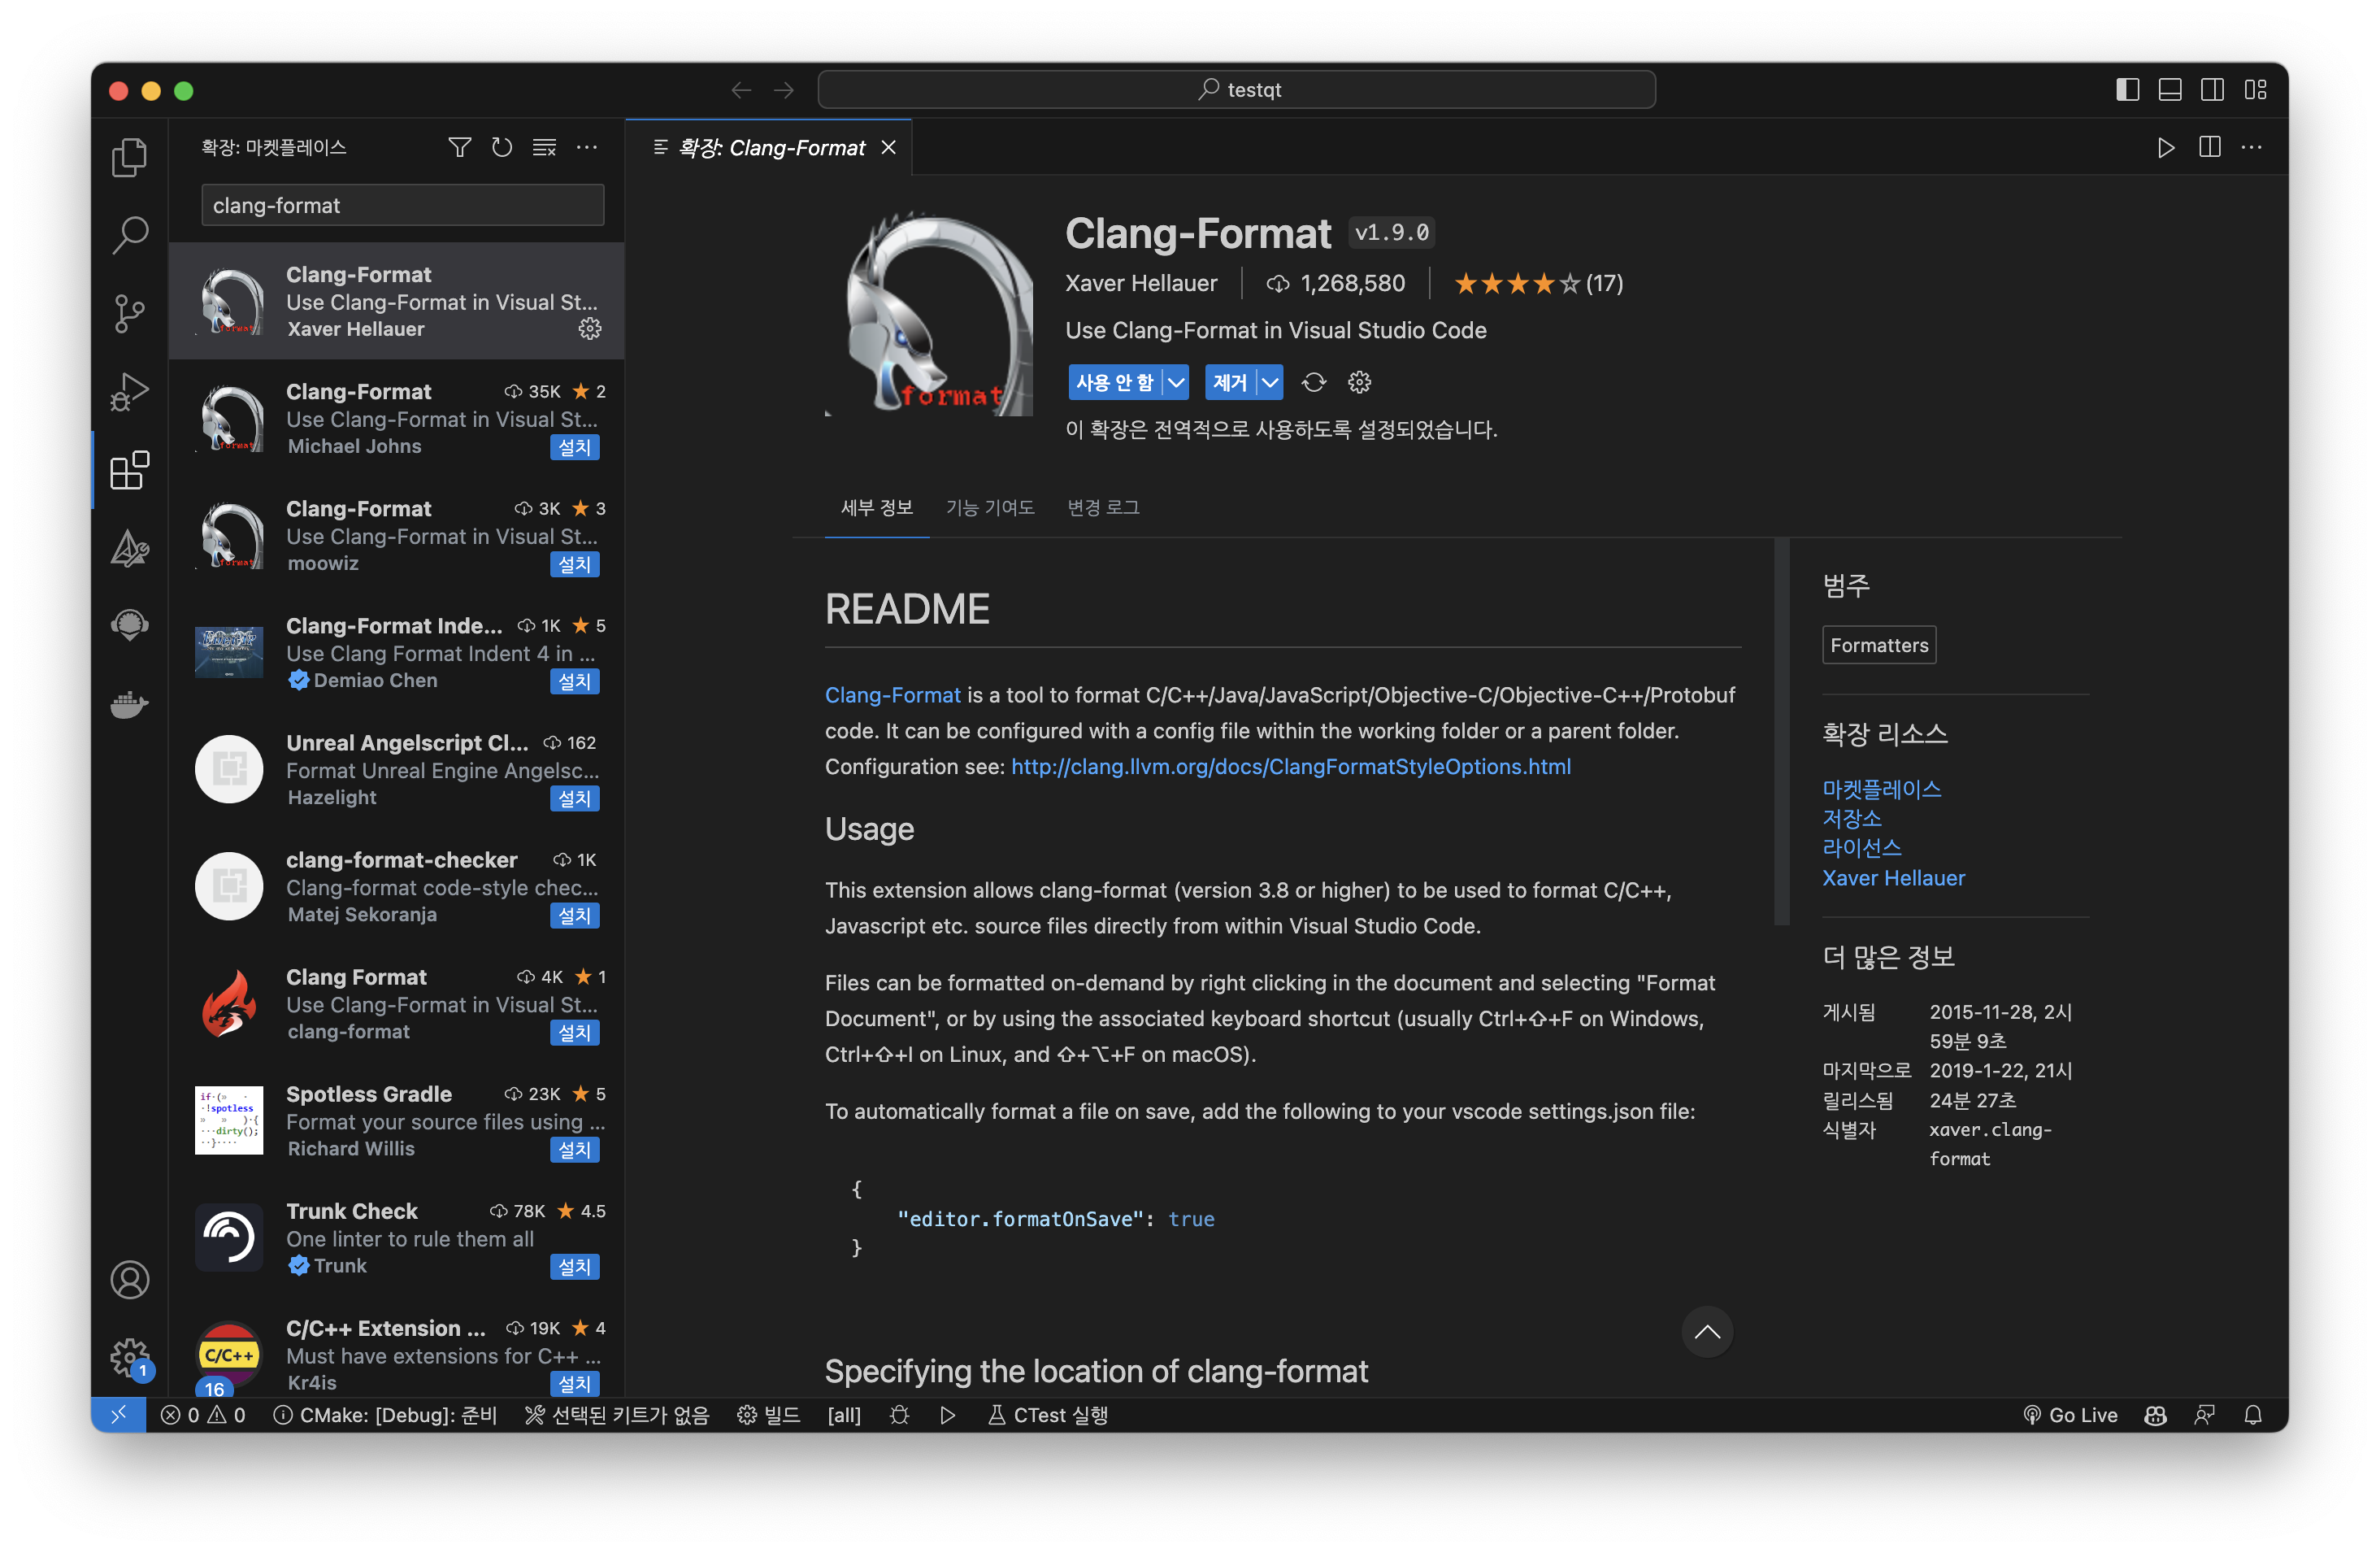
C++는 Clang-format이라는 대표적인 코드 포매터를 갖고 있습니다. C++만 아니라 C/Java/JavaScript/JSON/Objective-C/Protobuf/C# 언어도 지원합니다. 원래는 CLI로 작동을 하지만, CLion IDE의 경우 기본 포매터로 내장되어 있고, VS Code에서도 Clang-format을 지원해서, 명령어가 아닌 단축키나 에디터의 기능으로 사용할 수 있습니다.
Google, Microsoft, LLVM, Chromium 등 여러 기업이나 단체의 스타일들이 기본 스타일로 미리 정의되어 있습니다. 이러한 스타일을 사용할 수도 있고, 직접 .clang-format 파일을 수정해서 사용자가 정의한 포맷을 사용할 수도 있습니다.
.clang-format은 Clang-format 사용 시, 어떤 스타일과 설정들로 코드를 포매팅할 것인지 결정하는 세팅 파일입니다. 만약에 .clang-format이 루트 디렉토리에서 발견되지 않고, 스타일 역시 지정해주지 않았다면, 기본으로 LLVM의 코드 스타일이 적용됩니다.
Clang-format CLI로 사용하기
#include <QApplication>
#include <QPushButton>

namespace button {
    class Button : public QPushButton {
        Q_OBJECT
    public:
        Button(QWidget *parent = nullptr) : QPushButton(parent) {
            connect(this, &QPushButton::clicked, this, &Button::onClick);
        }
    signals:
        void clicked();
    private slots:
        void onClick() {
            emit clicked();
        }
    };
}// namespace button

int main(int argc, char *argv[]) {
    QApplication a(argc, argv);
    QPushButton button("Hello world!", nullptr);
    button.resize(200, 100);
    button.show();
    return QApplication::exec();
}
같은 디렉토리 내에 위와 같은 main.cpp가 있다고 가정합니다.
$ clang-format -style=google -i main.cpp이렇게 하면, 같은 디렉토리 내에 main.cpp 파일에 대해서, 미리 정의된 포맷(pre-defined format)인 Google 스타일로 main.cpp를 포매팅합니다.
결과를 보면 아래와 같습니다.
#include <QApplication>
#include <QPushButton>

namespace button {
class Button : public QPushButton {
  Q_OBJECT
 public:
  Button(QWidget *parent = nullptr) : QPushButton(parent) {
    connect(this, &QPushButton::clicked, this, &Button::onClick);
  }
 signals:
  void clicked();
 private slots:
  void onClick() { emit clicked(); }
};
}  // namespace button

int main(int argc, char *argv[]) {
  QApplication a(argc, argv);
  QPushButton button("Hello world!", nullptr);
  button.resize(200, 100);
  button.show();
  return QApplication::exec();
}
띄어쓰기 간격, 함수의 줄바꿈 등 다양한 부분에서 변경이 적용된 것을 확인할 수 있습니다.
이번에는 Microsoft의 스타일로 적용해보죠.
$ clang-format -style=microsoft -i main.cpp#include <QApplication>
#include <QPushButton>
namespace button
{
class Button : public QPushButton
{
Q_OBJECT
public:
Button(QWidget *parent = nullptr) : QPushButton(parent)
{
connect(this, &QPushButton::clicked, this, &Button::onClick);
}
signals:
void clicked();
private slots:
void onClick()
{
emit clicked();
}
};
} // namespace button
int main(int argc, char *argv[])
{
QApplication a(argc, argv);
QPushButton button("Hello world!", nullptr);
button.resize(200, 100);
button.show();
return QApplication::exec();
}마이크로소프트는 줄 간격이 네 칸이고, 함수나 클래스의 스코프(중괄호)를 열 때 무조건 줄바꿈을 하도록 강제하는 특성이 있습니다. 제가 선호하는 스타일이기도 합니다.
.clang-format 파일
만약에 특정 스타일로 .clang-format을 생성하고 싶은 경우에, 다음 명령어를 입력합니다.
$ clang-format -style=microsoft -dump-config > .clang-format.clang-format을 만들게 되면, 특정한 스타일에 대한 Configuration을 파일로 생성할 수 있습니다.
예를 들어서 Microsoft의 스타일로 .clang-format 파일을 생성하면 아래와 같이 나옵니다.
접은 블록 보기:
Microsoft:
---
Language:        Cpp
# BasedOnStyle:  Microsoft
AccessModifierOffset: -2
AlignAfterOpenBracket: Align
AlignArrayOfStructures: None
AlignConsecutiveAssignments:
  Enabled:         false
  AcrossEmptyLines: false
  AcrossComments:  false
  AlignCompound:   false
  PadOperators:    true
AlignConsecutiveBitFields:
  Enabled:         false
  AcrossEmptyLines: false
  AcrossComments:  false
  AlignCompound:   false
  PadOperators:    false
AlignConsecutiveDeclarations:
  Enabled:         false
  AcrossEmptyLines: false
  AcrossComments:  false
  AlignCompound:   false
  PadOperators:    false
AlignConsecutiveMacros:
  Enabled:         false
  AcrossEmptyLines: false
  AcrossComments:  false
  AlignCompound:   false
  PadOperators:    false
AlignEscapedNewlines: Right
AlignOperands:   Align
AlignTrailingComments:
  Kind:            Always
  OverEmptyLines:  0
AllowAllArgumentsOnNextLine: true
AllowAllParametersOfDeclarationOnNextLine: true
AllowShortBlocksOnASingleLine: Never
AllowShortCaseLabelsOnASingleLine: false
AllowShortEnumsOnASingleLine: false
AllowShortFunctionsOnASingleLine: None
AllowShortIfStatementsOnASingleLine: Never
AllowShortLambdasOnASingleLine: All
AllowShortLoopsOnASingleLine: false
AlwaysBreakAfterDefinitionReturnType: None
AlwaysBreakAfterReturnType: None
AlwaysBreakBeforeMultilineStrings: false
AlwaysBreakTemplateDeclarations: MultiLine
AttributeMacros:
  - __capability
BinPackArguments: true
BinPackParameters: true
BitFieldColonSpacing: Both
BraceWrapping:
  AfterCaseLabel:  false
  AfterClass:      true
  AfterControlStatement: Always
  AfterEnum:       true
  AfterExternBlock: true
  AfterFunction:   true
  AfterNamespace:  true
  AfterObjCDeclaration: true
  AfterStruct:     true
  AfterUnion:      false
  BeforeCatch:     true
  BeforeElse:      true
  BeforeLambdaBody: false
  BeforeWhile:     false
  IndentBraces:    false
  SplitEmptyFunction: true
  SplitEmptyRecord: true
  SplitEmptyNamespace: true
BreakAfterAttributes: Never
BreakAfterJavaFieldAnnotations: false
BreakArrays:     true
BreakBeforeBinaryOperators: None
BreakBeforeConceptDeclarations: Always
BreakBeforeBraces: Custom
BreakBeforeInlineASMColon: OnlyMultiline
BreakBeforeTernaryOperators: true
BreakConstructorInitializers: BeforeColon
BreakInheritanceList: BeforeColon
BreakStringLiterals: true
ColumnLimit:     120
CommentPragmas:  '^ IWYU pragma:'
CompactNamespaces: false
ConstructorInitializerIndentWidth: 4
ContinuationIndentWidth: 4
Cpp11BracedListStyle: true
DerivePointerAlignment: false
DisableFormat:   false
EmptyLineAfterAccessModifier: Never
EmptyLineBeforeAccessModifier: LogicalBlock
ExperimentalAutoDetectBinPacking: false
FixNamespaceComments: true
ForEachMacros:
  - foreach
  - Q_FOREACH
  - BOOST_FOREACH
IfMacros:
  - KJ_IF_MAYBE
IncludeBlocks:   Preserve
IncludeCategories:
  - Regex:           '^"(llvm|llvm-c|clang|clang-c)/'
    Priority:        2
    SortPriority:    0
    CaseSensitive:   false
  - Regex:           '^(<|"(gtest|gmock|isl|json)/)'
    Priority:        3
    SortPriority:    0
    CaseSensitive:   false
  - Regex:           '.*'
    Priority:        1
    SortPriority:    0
    CaseSensitive:   false
IncludeIsMainRegex: '(Test)?$'
IncludeIsMainSourceRegex: ''
IndentAccessModifiers: false
IndentCaseBlocks: false
IndentCaseLabels: false
IndentExternBlock: AfterExternBlock
IndentGotoLabels: true
IndentPPDirectives: None
IndentRequiresClause: true
IndentWidth:     4
IndentWrappedFunctionNames: false
InsertBraces:    false
InsertNewlineAtEOF: false
InsertTrailingCommas: None
IntegerLiteralSeparator:
  Binary:          0
  BinaryMinDigits: 0
  Decimal:         0
  DecimalMinDigits: 0
  Hex:             0
  HexMinDigits:    0
JavaScriptQuotes: Leave
JavaScriptWrapImports: true
KeepEmptyLinesAtTheStartOfBlocks: true
LambdaBodyIndentation: Signature
LineEnding:      DeriveLF
MacroBlockBegin: ''
MacroBlockEnd:   ''
MaxEmptyLinesToKeep: 1
NamespaceIndentation: None
ObjCBinPackProtocolList: Auto
ObjCBlockIndentWidth: 2
ObjCBreakBeforeNestedBlockParam: true
ObjCSpaceAfterProperty: false
ObjCSpaceBeforeProtocolList: true
PackConstructorInitializers: BinPack
PenaltyBreakAssignment: 2
PenaltyBreakBeforeFirstCallParameter: 19
PenaltyBreakComment: 300
PenaltyBreakFirstLessLess: 120
PenaltyBreakOpenParenthesis: 0
PenaltyBreakString: 1000
PenaltyBreakTemplateDeclaration: 10
PenaltyExcessCharacter: 1000000
PenaltyIndentedWhitespace: 0
PenaltyReturnTypeOnItsOwnLine: 1000
PointerAlignment: Right
PPIndentWidth:   -1
QualifierAlignment: Leave
ReferenceAlignment: Pointer
ReflowComments:  true
RemoveBracesLLVM: false
RemoveSemicolon: false
RequiresClausePosition: OwnLine
RequiresExpressionIndentation: OuterScope
SeparateDefinitionBlocks: Leave
ShortNamespaceLines: 1
SortIncludes:    CaseSensitive
SortJavaStaticImport: Before
SortUsingDeclarations: LexicographicNumeric
SpaceAfterCStyleCast: false
SpaceAfterLogicalNot: false
SpaceAfterTemplateKeyword: true
SpaceAroundPointerQualifiers: Default
SpaceBeforeAssignmentOperators: true
SpaceBeforeCaseColon: false
SpaceBeforeCpp11BracedList: false
SpaceBeforeCtorInitializerColon: true
SpaceBeforeInheritanceColon: true
SpaceBeforeParens: ControlStatements
SpaceBeforeParensOptions:
  AfterControlStatements: true
  AfterForeachMacros: true
  AfterFunctionDefinitionName: false
  AfterFunctionDeclarationName: false
  AfterIfMacros:   true
  AfterOverloadedOperator: false
  AfterRequiresInClause: false
  AfterRequiresInExpression: false
  BeforeNonEmptyParentheses: false
SpaceBeforeRangeBasedForLoopColon: true
SpaceBeforeSquareBrackets: false
SpaceInEmptyBlock: false
SpaceInEmptyParentheses: false
SpacesBeforeTrailingComments: 1
SpacesInAngles:  Never
SpacesInConditionalStatement: false
SpacesInContainerLiterals: true
SpacesInCStyleCastParentheses: false
SpacesInLineCommentPrefix:
  Minimum:         1
  Maximum:         -1
SpacesInParentheses: false
SpacesInSquareBrackets: false
Standard:        Latest
StatementAttributeLikeMacros:
  - Q_EMIT
StatementMacros:
  - Q_UNUSED
  - QT_REQUIRE_VERSION
TabWidth:        4
UseTab:          Never
WhitespaceSensitiveMacros:
  - BOOST_PP_STRINGIZE
  - CF_SWIFT_NAME
  - NS_SWIFT_NAME
  - PP_STRINGIZE
  - STRINGIZE
...
그 외에는 직접 clang-format을 실행하면서 비교해보셔도 좋을 것 같습니다.
참고로, 명령어로 직접 실행한 .clang-format은 모든 Configuration들이 들어가있다 보니 다소 복잡합니다. 아래와 같이 작성해도 문제는 없습니다.
---
Language:        Cpp
BasedOnStyle: Microsoft
...
Clang-format Comparison 이 링크에서, LLVM, Google, Chromium, Mozilla, WebKit 스타일을 각각 적용했을 때 결과물을 한 눈에 보실 수 있습니다.
한편, 직접 자신이 Configuration들을 수정해서, 자신만의 포매팅 규칙을 만들어낼 수도 있습니다.
Clang-format Style Options에서, 여러 가지 포매팅 규칙을 읽을 수 있습니다. 사소한 규칙까지 정말 다양하게, 세부적으로 정의할 수 있습니다.
CLion에서 clang-format 사용하기
그러나 보통은 IDE나 에디터에서 직접 Clang-format과 연동해서 단축키로 사용하는 게 더 일반적입니다.
CLion에서 처음 프로젝트를 생성하게 되면, 아래와 같이 기본적으로 .Clang-format이 주어지게 됩니다.
.
├── .clang-format
├── CMakeLists.txt
└── main.cpp
그리고 이 clang-format은 LLVM에 기반하고 있습니다.

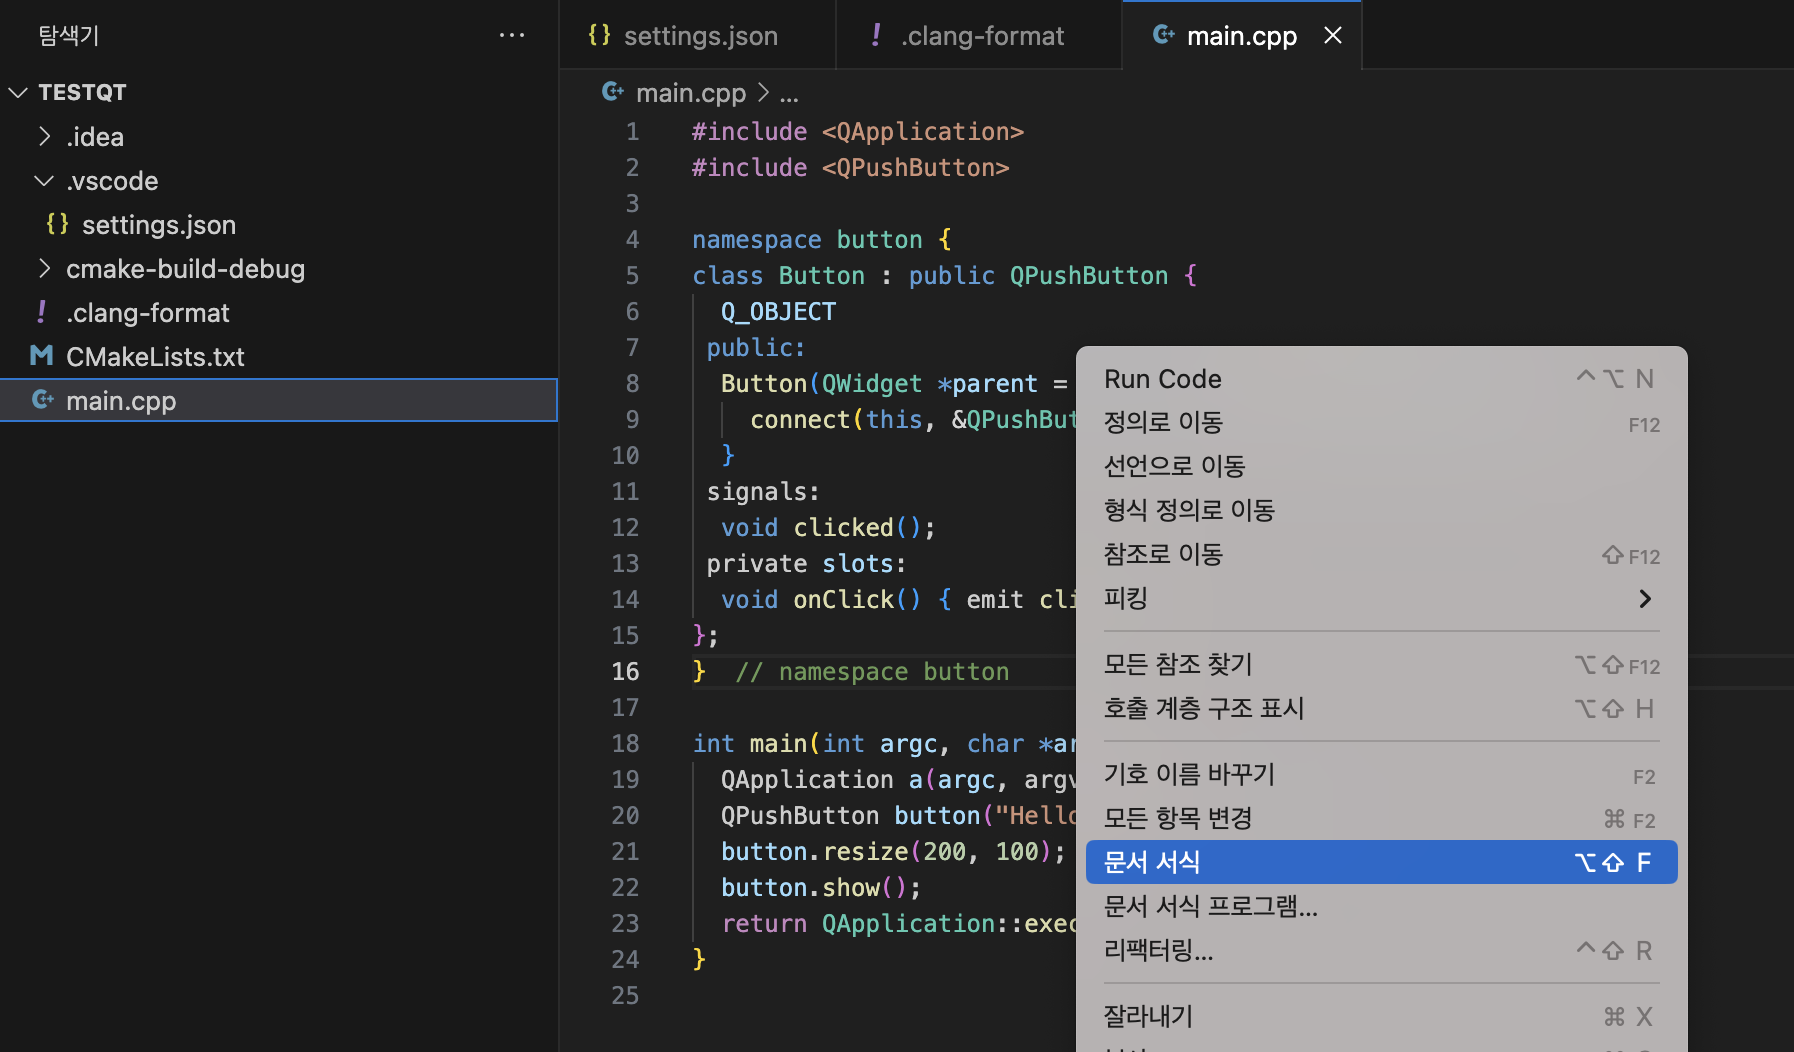
MacOS라면 상단의 Code → Reformat Code를 누르게 되면, 자동으로 코드를 포매팅할 수 있습니다.
단축키는 Option(⌥)+ Command(⌘) + L 입니다.
Visual Studio Code에서 Clang-format 사용하기
VSCode에서는 Clang-Format 확장 프로그램을 이용하면 사용할 수 있습니다.
확장 프로그램을 설치하고, 프로젝트 내에서 적용되는 VSCode의 설정인 .vscode/settings.json 파일을 생성합니다.
그리고서 clang-format의 executable 파일 위치를 알려주어야 합니다. 이는 which 명령어를 통해서 찾을 수 있는데요, 예를 들어서 터미널에서 which clang-format을 입력하면:
$ which clang-format
/opt/homebrew/bin/clang-format
그리고서 .vscode/settings.json 파일을 열어 다음과 같이 수정합니다.
{
    "clang-format.executable": "/opt/homebrew/bin/clang-format",
}
이후에 Shift(⇧) + Option(⌥) + F를 누르거나 메뉴창에서 사용 가능합니다.
[Python] black
Python은 PEP-8이라는, 자체적인 Python 코드를 쓸 때 권장하는 코딩 스타일을 갖고 있습니다. 만약에 Python을 주력으로 사용하신다면 한 번 즈음 읽어보시는 것도 좋습니다.
black은 PEP-8에 기반하여서 만들어진 코드 포매터입니다. black은 개인화가 자유로운 clang-format과 다르게, 개인이 설정할 수 있는 것이 거의 없습니다. black에서 정해놓은 The Black Code Style을 따르는 것이 강제됩니다.
black의 공식 홈페이지에는 스스로를 “Uncompromissing Code Formatter”라고 소개하고 있습니다. 즉 “단호한”, “타협하지 않는” 코드 포매터라 소개하고 있습니다.
이렇게 개인 설정이 거의 불가능한 엄격한 코드 포매터는 언뜻 보면 사용하기 불편해보이지만, 오히려 black을 사용함으로써 얻는 장점이 상당합니다.
개요에서 선술했듯 코드 포맷이 통일이 된다면, 그 장점이 커집니다. 팀 단위, 혹은 회사 단위에서 정해놓은 코드 포맷 규칙이 외부에서 통용되는 규칙과 다르거나, 혹은 통용되는 규칙 자체가 없다면, 새로운 인원이 팀에 들어왔을 때 이를 적응하기도 어려울 뿐더러, 외부의 코드를 팀 내로 가져와서 활용하기가 곤란할 것입니다.
특히 Python은 들여쓰기가 문법에도 영향을 끼치는 언어라서 이에 대해 좀 더 민감합니다. Tab과 Space 네 칸이 서로 다르게 인식되어 문법상의 오류를 낼 수 있는 언어입니다.
그래서 Python 팀은 PEP-8이라는 공식적인 코드 규칙을 적용하기 시작했고, Black 역시 개인화의 여지 없이 Python을 쓰는 모두가 같은 코드 포매팅 규칙을 적용하도록 설계되었습니다.
black 설치하기
pip를 통해서 black을 설치할 수 있습니다.
$ pip install blackblack 사용하기
$ black {source_file_or_directory}위 명령어로 사용이 가능한데, 만약에 작동하지 않을 경우 아래 명령어로 사용 가능합니다.
$ python -m black {source_file_or_directory}아래와 같이 polls/views.py 파일이 있다고 가정해보겠습니다.
from typing import Any
from django.utils import timezone
from django.http import HttpResponseRedirect
from django.shortcuts import render, get_object_or_404
from .models import Question, Choice
from django.urls import reverse
from django.views import generic
from django.db.models.query import QuerySet

class IndexView(generic.ListView):
    template_name= 'polls/index.html'
    context_object_name= 'latest_question_list'

    def get_queryset(self)-> QuerySet[Any]:
        return Question.objects.filter(
            pub_date__lte=timezone.now()
        ).order_by('-pub_date')[:5]

class DetailView(generic.DetailView):
    model= Question
    template_name = 'polls/detail.html'

    def get_queryset(self)-> QuerySet[Any]:
        return Question.objects.filter(pub_date__lte=timezone.now())

class ResultsView(generic.DetailView):
    model= Question
    template_name= 'polls/results.html'

def vote(request, question_id):
    question= get_object_or_404(Question, pk=question_id)
    try:
        selected_choice = question.choice_set.get(pk=request.POST["choice"])
    except (KeyError, Choice.DoesNotExist):
        # redisplay the question voting form
        return render(
            request, 'polls/detail.html', {
                "question": question,
                "error_message": "You do not select a choice",
            },
        )
    else:
        selected_choice.votes+= 1
        selected_choice.save()
        return HttpResponseRedirect(reverse("polls:results", args=(question.id, )))
여기서 black을 적용합니다.
$ black polls
reformatted /Users/nx006/Documents/study/mysite/polls/apps.py
reformatted /Users/nx006/Documents/study/mysite/polls/urls.py
reformatted /Users/nx006/Documents/study/mysite/polls/models.py
reformatted /Users/nx006/Documents/study/mysite/polls/migrations/0001_initial.py
reformatted /Users/nx006/Documents/study/mysite/polls/views.py
reformatted /Users/nx006/Documents/study/mysite/polls/tests.py

All done! ✨ 🍰 ✨
6 files reformatted, 3 files left unchanged.
from typing import Any
from django.utils import timezone
from django.http import HttpResponseRedirect
from django.shortcuts import render, get_object_or_404
from .models import Question, Choice
from django.urls import reverse
from django.views import generic
from django.db.models.query import QuerySet
class IndexView(generic.ListView):
template_name = "polls/index.html"
context_object_name = "latest_question_list"
def get_queryset(self) -> QuerySet[Any]:
return Question.objects.filter(pub_date__lte=timezone.now()).order_by(
"-pub_date"
)[:5]
class DetailView(generic.DetailView):
model = Question
template_name = "polls/detail.html"
def get_queryset(self) -> QuerySet[Any]:
return Question.objects.filter(pub_date__lte=timezone.now())
class ResultsView(generic.DetailView):
model = Question
template_name = "polls/results.html"
def vote(request, question_id):
question = get_object_or_404(Question, pk=question_id)
try:
selected_choice = question.choice_set.get(pk=request.POST["choice"])
except (KeyError, Choice.DoesNotExist):
# redisplay the question voting form
return render(
request,
"polls/detail.html",
{
"question": question,
"error_message": "You do not select a choice",
},
)
else:
selected_choice.votes += 1
selected_choice.save()
return HttpResponseRedirect(reverse("polls:results", args=(question.id,)))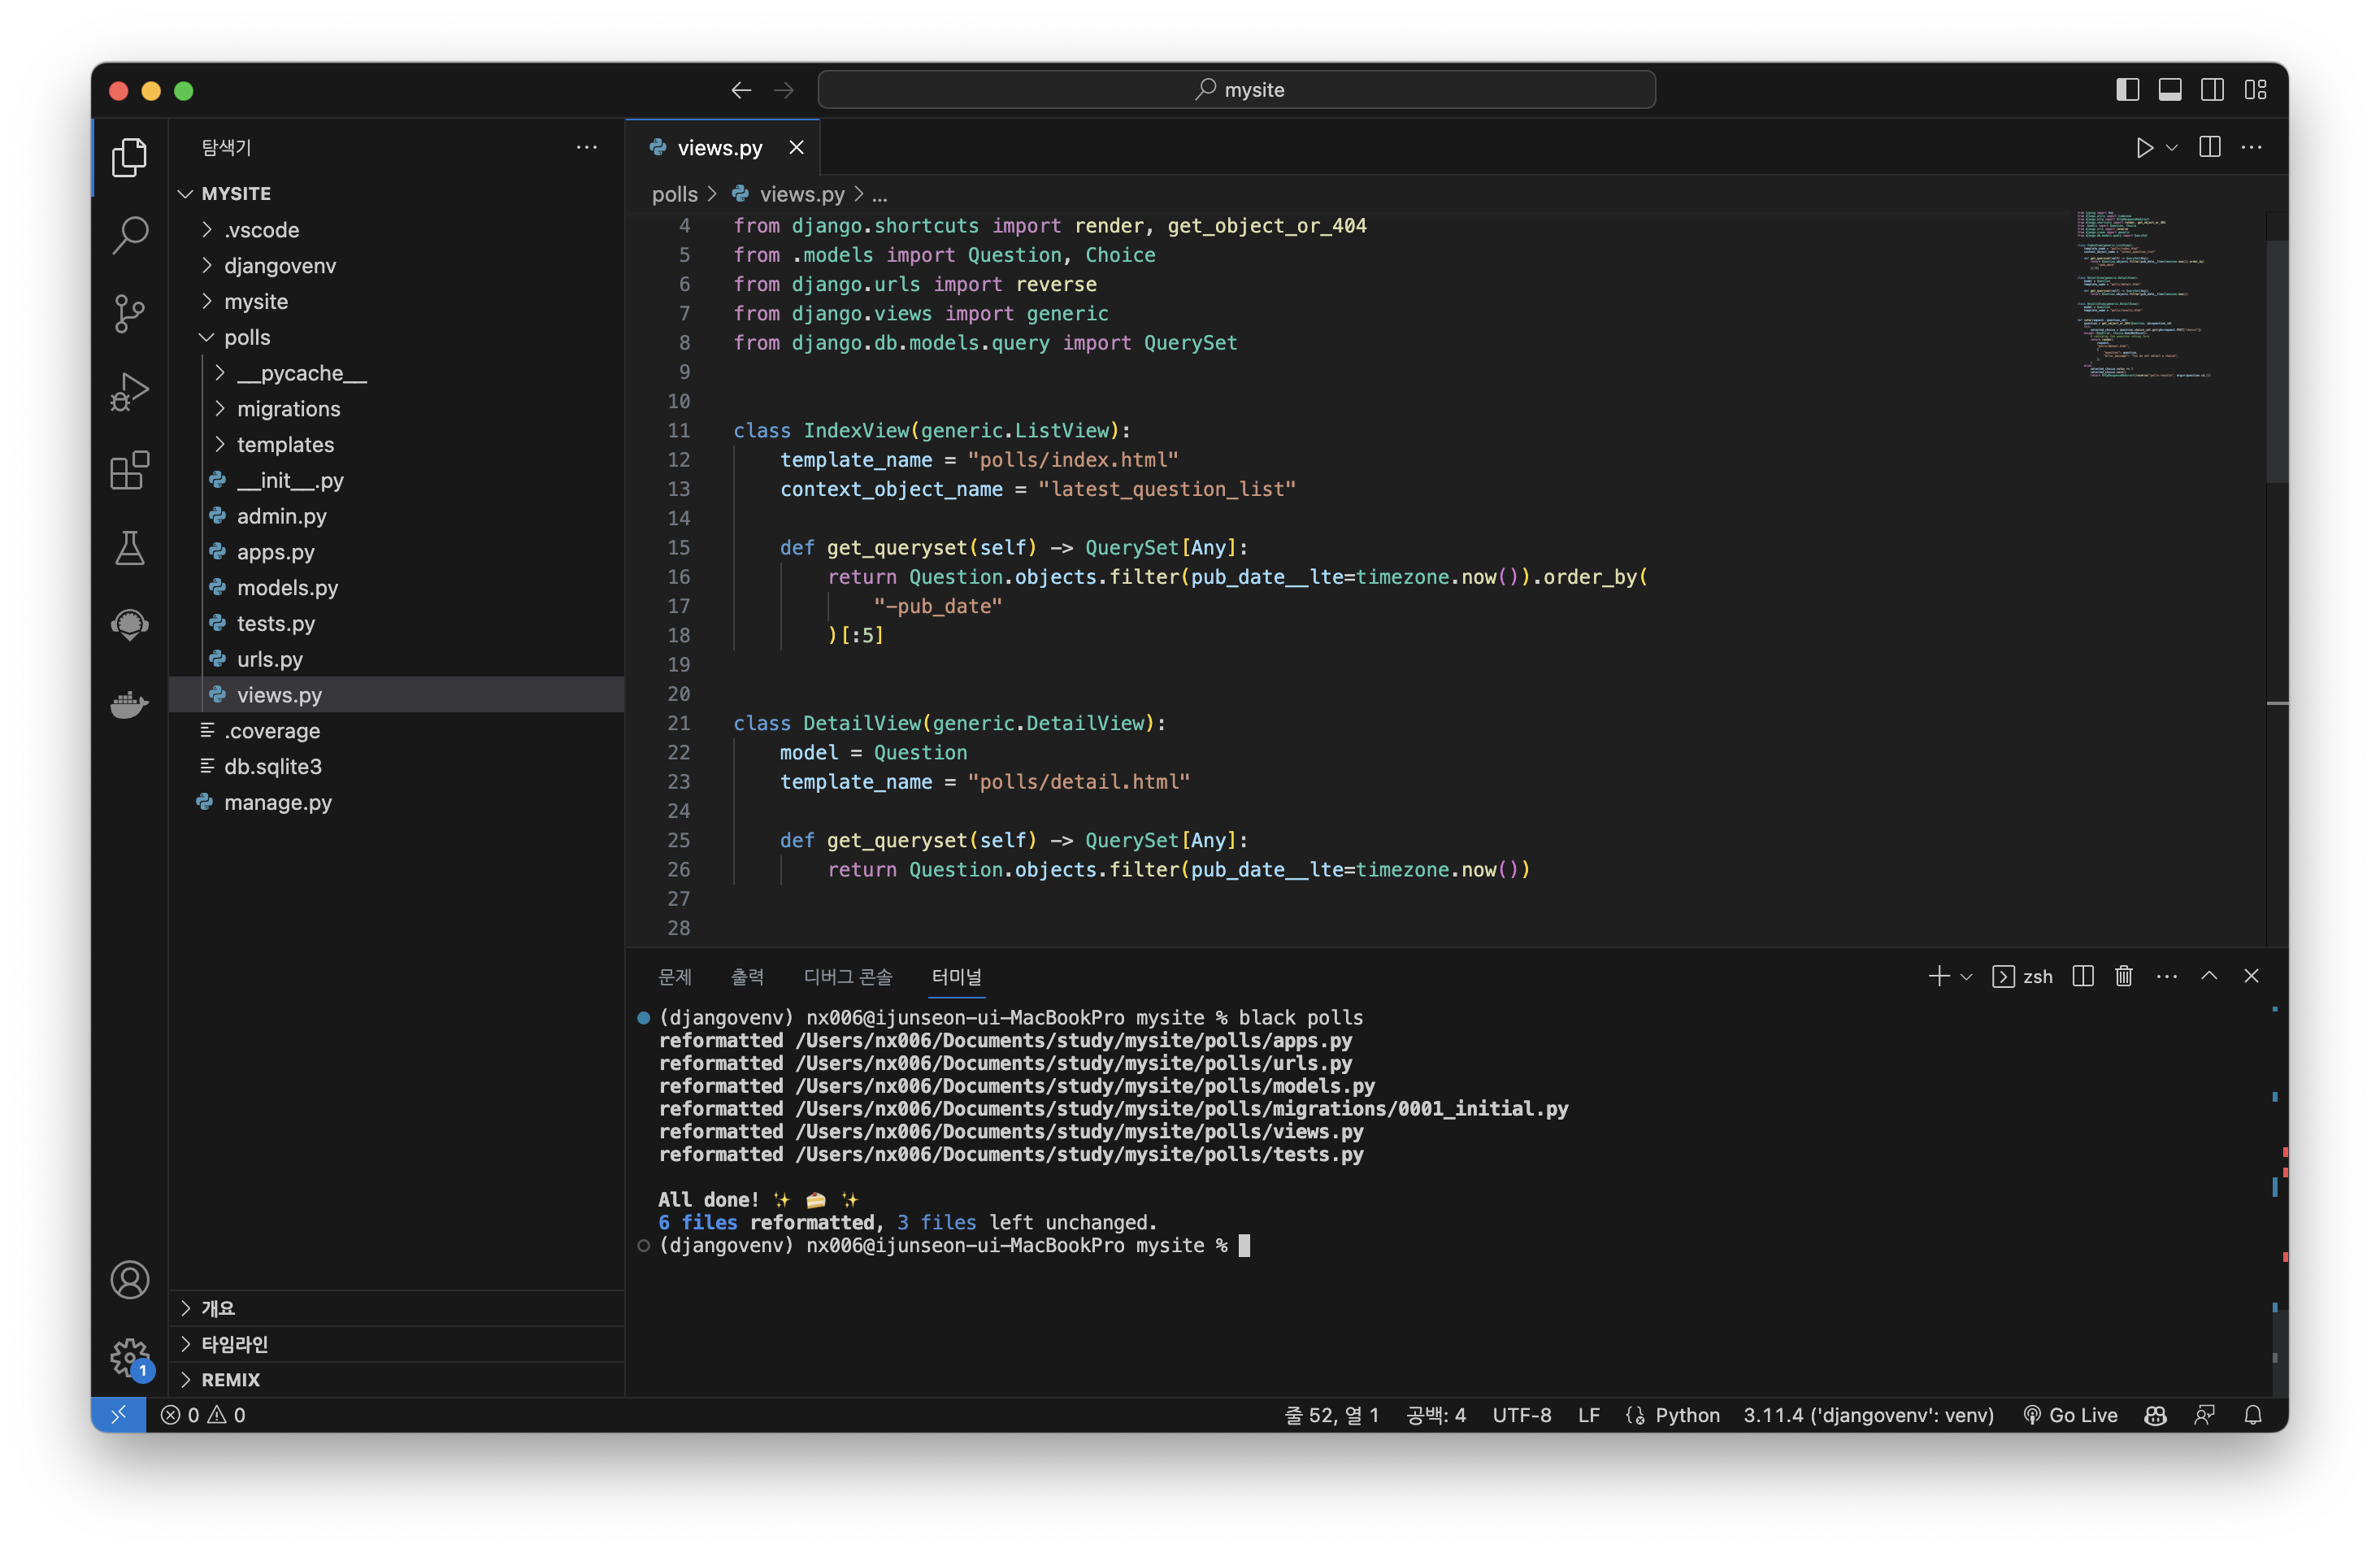
이렇게 포매팅이 완료된 것을 확인할 수 있습니다!
보시면 알겠지만 단순한 줄바꿈 뿐만 아니라, String에 대해서 '가 아닌 "로 감싸는 등 실제 코드에도 관여를 하고 있습니다(그러나 로직에 영향을 끼치지는 않습니다).
Configuration File 생성하기
물론 black의 포매팅 규칙에 대해서는 개인이 건들 수 있는 부분이 없지만, 어떤 디렉토리를 포매팅에서 제외할 지(예: test 디렉토리 속 파일들을 포매팅에서 제외) 등의 설정을 추가할 수 있습니다.
세팅 파일은 루트 디렉토리의 pyproject.toml 파일로 설정합니다. 파일 확장자가 JSON, YAML이 아닌 TOML임에 주의하십시오.
[tool.black]
line-length = 88
target-version = ['py37']
include = '\.pyi?$'
# 'extend-exclude' excludes files or directories in addition to the defaults
extend-exclude = '''
# A regex preceded with ^/ will apply only to files and directories
# in the root of the project.
(
  ^/foo.py    # exclude a file named foo.py in the root of the project
  | .*_pb2.py  # exclude autogenerated Protocol Buffer files anywhere in the project
)
'''
예를 들어서 이런 식으로 설정할 수 있겠습니다. python version은 3.7로, 그리고 foo.py 파일과 ProtoBuf 파일을 제외하도록 설정할 수 있습니다.
Pycharm에서 black 사용하기
사실, pep-8에 기반해서 이미 Pycharm에서는 상당히 높은 수준의 Code Linting과 Code Formatting을 제공하고 있기는 합니다. 팀 전체가 Pycharm을 쓰기로 했다면, 굳이 black을 써야 하나 싶을 수도 있겠지만, Pycharm에서의 린팅/포매팅 규칙과 black의 규칙은 일부 다르므로 팀 내에서 black을 쓰기로 했다면 Pycharm에서도 black을 써야 합니다.
Settings(맥에서 단축키로 cmd ⌘ + ,) → Tools → File Watchers에 들어갑니다.

플러스(+) 버튼에서 <Custom>을 누릅니다.

위와 같이 설정하고 OK를 누르면 됩니다.
$ which black
/opt/homebrew/bin/black
참고로 black의 위치를 모를 때에는, which black을 사용해서 검색하면 된다는 것을 잊지 마세요.
from rest_framework.response import Response
from rest_framework.decorators import api_view
from .models import Quiz
from .serializers import QuizSerializers
import random

@api_view(['GET'])
def hello(request):
    return Response('Hello World')

@api_view(['GET'])
def random_quiz(request, id: int):
    total_quiz = Quiz.objects.all()
    random_quiz_list = random.sample(
        list(total_quiz),
        id
    )
    serializer = QuizSerializers(
        random_quiz_list,
        many=True
    )

    return Response(serializer.data)
위의 예시에서, CLion과 같이 Option(⌥)+ Command(⌘) + L을 누르게 되면

이렇게 바뀌었습니다.
사실 이미 PyCharm에서 제공하는 자동 포매팅 기능이 Black과 거의 유사해서, 차이점을 느끼기 어려울 것입니다.
Visual Studio Code에서 black 사용하기

VSCode에서도 마찬가지로, 확장 기능을 통해서 black을 사용하시면 됩니다.
[Python] YAPF
그런데 black은 자신들이 정하는 단 하나의 규칙만을 강제한다고 하였습니다. 그러나 만약에 팀에서 다른 코드 스타일을 이미 도입하고 있었다면 어떻게 해야 할까요? 예를 들어서 Google Python Coding Style의 경우, PEP-8과는 다른 코딩 스타일을 적용하고 있습니다.
이때는 Google의 개발자가 만든 YAPF를 이용하면 좋습니다. YAPF는 Clang-Format에 기반하여 만들어진 Python 포매터입니다.
YAPF의 장점은 Pre-defined된 스타일을 고를 수 있습니다. PEP-8 뿐만 아니라 Google, YAPF(Google Open Source Project에 사용되는 코딩 스타일), facebook 중에서 고를 수 있습니다.
style.py를 열고, 다음과 같이 수정합니다:
[style]
based_on_style = pep8
spaces_before_comment = 4
split_before_logical_operator = true
x = { 'a':37,'b':42,
'c':927}
y = 'hello ''world'
z = 'hello '+'world'
a = 'hello {}'.format('world')
class foo ( object ):
def f (self ):
return 37*-+2
def g(self, x,y=42):
return y
def f ( a ) :
return 37+-+a[42-x : y**3]위 엉망진창인 코드(test.py라 하겠습니다)에 대해서 아래 명령어를 실행한다면:
$ yapf -i test.py style=googlex = {'a': 37, 'b': 42, 'c': 927}
y = 'hello ' 'world'
z = 'hello ' + 'world'
a = 'hello {}'.format('world')
class foo(object):
def f(self):
return 37 * -+2
def g(self, x, y=42):
return y
def f(a):
return 37 + -+a[42 - x:y**3]이렇게 바뀌는 것을 확인할 수 있습니다.
또한, pyproject.toml 파일을 생성해서, 무시할 파일들을 ignore_patterns 로 정의할 수 있습니다.
[tool.yapfignore]
ignore_patterns = [
  "temp/**/*.py",
  "temp2/*.py"
]
이렇게 하면 전체 디렉토리에서 한 번에 포매팅을 돌릴 때 더 유리하겠죠.
YAPF github에서, 자세한 사용 방법을 추가로 읽어볼 수 있습니다.
[Python] PyInk
YAPF는 Google의 개발자 출신이 만든 것은 맞지만, Google의 공식 제품은 아닙니다. Google Python Style Guide에 의하면 Google 팀은 Black과 PyInk를 사용해서 코드 포매팅을 적용한다고 소개하고 있습니다.
PyInk는 Google에서 만든 공식적인 Python Formatter로, 너무 엄격하게 자신들의 스타일 철학을 고수하는 Black에서 조금 더 유연함을 찾는 개발자들이 선택할 수 있도록 개발되었습니다.
PyInk와 black과의 차이점
PyInk는 일부 규칙들을 변경할 수 있습니다. 그래서 black과 다른 포매팅 결과를 보일 수 있는데, 소소하게는 아래 사항들이 다릅니다:
- Do not wrap trailing pragma comments if the line exceeds the length only because of the pragma (psf/black#2843)
# Pyink:
result = some_other_module._private_function(arg="value")  # pylint: disable=protected-access

# Black:
result = some_other_module._private_function(
    arg="value"
) # pylint: disable=protected-access- Do not wrap imports in parentheses and move them to separate lines (psf/black#3324)
# Pyink:
from very_long_top_level_package_name.sub_package.another_level import a_long_module

# Black:
from very_long_top_level_package_name.sub_package.another_level import (
    a_long_module,
)- Prefer not breaking lines between immediately nested brackets (psf/black#1811)
# Pyink:
secrets = frozenset({
    1001,
    1002,
    1003,
    1004,
    1005,
    1006,
    1007,
    1008,
    1009,
})

# Black:
secrets = frozenset(
    {
        1001,
        1002,
        1003,
        1004,
        1005,
        1006,
        1007,
        1008,
        1009,
    }
)- 문자열이 한 줄에 맞지 않을 때, String 주위에 기존 괄호가 유지됨(psf#3640). 이렇게 하면 둘로 나뉘어진 문자열에 대해서 괄호를 유지해서, 암시적으로 단일 함수 인자임을 명확하게 표현할 수 있습니다
# Original code:
func1(
    (
        " lorem ipsum dolor sit amet consectetur adipiscing elit sed do eiusmod tempor"
        " incididunt ut labore et dolore magna aliqua Ut enim ad minim"
    ),
    " lorem ipsum dolor sit amet consectetur adipiscing elit sed do eiusmod tempor",
)

func2(
    " lorem ipsum dolor sit amet consectetur adipiscing elit sed do eiusmod tempor"
    " incididunt ut labore et dolore magna aliqua Ut enim ad minim",
    " lorem ipsum dolor sit amet consectetur adipiscing elit sed do eiusmod tempor",
)

# Pyink:
func1(
    (
        " lorem ipsum dolor sit amet consectetur adipiscing elit sed do eiusmod tempor"
        " incididunt ut labore et dolore magna aliqua Ut enim ad minim"
    ),
    " lorem ipsum dolor sit amet consectetur adipiscing elit sed do eiusmod tempor",
)

func2(
    " lorem ipsum dolor sit amet consectetur adipiscing elit sed do eiusmod tempor"
    " incididunt ut labore et dolore magna aliqua Ut enim ad minim",
    " lorem ipsum dolor sit amet consectetur adipiscing elit sed do eiusmod tempor",
)

# Black:
func1(
    " lorem ipsum dolor sit amet consectetur adipiscing elit sed do eiusmod tempor"
    " incididunt ut labore et dolore magna aliqua Ut enim ad minim",
    " lorem ipsum dolor sit amet consectetur adipiscing elit sed do eiusmod tempor",
)

func2(
    " lorem ipsum dolor sit amet consectetur adipiscing elit sed do eiusmod tempor"
    " incididunt ut labore et dolore magna aliqua Ut enim ad minim",
    " lorem ipsum dolor sit amet consectetur adipiscing elit sed do eiusmod tempor",
)
사용법
Black과 거의 유사합니다. 심지어 같이 사용할 수도 있습니다. 모든 black의 command들은 PyInk에서도 유지됩니다. 대신 configuration을 설정해주기 위해서 pyproject.toml을 작성할 때, 앞에 [tool.black] 대신 [tool.pyink] 를 넣어주어야 합니다.
Visual Studio Code에서 PyInk 사용하기
사실, PyInk는 VS Code를 지원하지 않습니다😢. 대신 편법을 사용할 수 있는데, 위에서 소개한 Black Formatter Extension에서, Formatter를 Black 대신 PyInk를 사용하는 방법입니다.
{
    "[python]": {
        "editor.defaultFormatter": "ms-python.black-formatter"
    },
    "black-formatter.path": [
        "path/to/pyink"
    ]
}.vscode/settings.json에서 위와 같이 설정해주면, 편법으로 사용할 수는 있습니다.
[JavaScript] Prettier

Prettier는 JavaScript를 위한 코드 포맷팅 도구입니다. JavaScript의 코드 린팅 도구인 ESLint는 많이 사용해보셨을 겁니다. Prettier와 함께 사용한다면, 더 강력하게 두 도구를 이용할 수 있습니다.
Prettier 역시 Python의 Black과 마찬가지로, 자신들이 정해놓은 스타일 가이드를 벗어나지 않도록 강제합니다. 따라서 개발자는 어떤 코딩 스타일을 따를 지 고민할 필요가 없습니다.
function HelloWorld({greeting = "hello", greeted = '"World"', silent = false, onMouseOver,}) {

  if(!greeting){return null};

     // TODO: Don't use random in render
  let num = Math.floor (Math.random() * 1E+7).toString().replace(/\.\d+/ig, "")

  return <div className='HelloWorld' title={`You are visitor number ${ num }`} onMouseOver={onMouseOver}>

    <strong>{ greeting.slice( 0, 1 ).toUpperCase() + greeting.slice(1).toLowerCase() }</strong>
    {greeting.endsWith(",") ? " " : <span style={{color: '\grey'}}>", "</span> }
    <em>
    { greeted }
    </em>
    { (silent)
      ? "."
      : "!"}

    </div>;

}
위와 같이 어지럽게 정렬된 JavaScript 코드(index.js 파일)를 Prettier를 이용해서 포매팅하면
$ npx prettier "index.js"function HelloWorld({
greeting = "hello",
greeted = '"World"',
silent = false,
onMouseOver,
}) {
if (!greeting) {
return null;
}
// TODO: Don't use random in render
let num = Math.floor(Math.random() * 1e7)
.toString()
.replace(/\.\d+/gi, "");
return (
<div
className="HelloWorld"
title={`You are visitor number ${num}`}
onMouseOver={onMouseOver}
>
<strong>
{greeting.slice(0, 1).toUpperCase() + greeting.slice(1).toLowerCase()}
</strong>
{greeting.endsWith(",") ? (
" "
) : (
<span style={{ color: "grey" }}>", "</span>
)}
<em>{greeted}</em>
{silent ? "." : "!"}
</div>
);
}이렇게 깔끔하게 정리할 수 있습니다.
공식 홈페이지에서는 JavaScript 외에도, TypeScript, CSS, JSON, HTML, YAML, Markdown 파일을 지원한다고 소개합니다. 또한 Vue, Angular 등에 특화된 포맷도 지원한다고 소개하고 있는데, 해당 프레임워크를 쓰시는 분들은 한 번 살펴보아도 좋을 것 같습니다.
Visual Studio Code에서 Prettier 사용하기
먼저 Prettier는 아래 명령어로 설치합니다.
$ npm install -D prettier그리고 마찬가지로 Prettier extension을 설치하면 됩니다.
[Dart] Dart Formatter
Dart 언어는 2011년에 Google에서 개발한 멀티 플랫폼 언어로, Flutter의 기반 언어입니다.
Dart 언어의 강력한 점은, 자체적인 포매터를 탑재하고 있습니다. 따라서 전 세계의 모든 Dart 언어 사용자들은 모두 똑같은 규칙으로 코드를 작성할 수 있습니다.
Future<void> addToBasket({required ProductModel product}) async
{
  final isExist = _isExist(product);

  if (isExist) {
    state = state
        .map((e) => e.product.id == product.id
        ? e.copyWith(count: e.count + 1,) :
        e).toList();
  }
  else {
    state = [...state, BasketItemModel(product: product, count: 1),];
  }
}
이렇게 작성된 코드에 대해서 포매팅을 적용하면
$ dart format .Future<void> addToBasket({required ProductModel product}) async {
final isExist = _isExist(product);
if (isExist) {
state = state
.map((e) =>
e.product.id == product.id ? e.copyWith(count: e.count + 1) : e)
.toList();
} else {
state = [
...state,
BasketItemModel(
product: product,
count: 1,
),
];
}
}이렇게, 포매팅이 변경됩니다.
참고로 dart format <file/directory 명> 으로 CLI를 이용해서 포매팅을 할 수도 있지만, 당연히 IDE나 Editor의 단축키로 포맷하는 게 훨씬 빠릅니다. 또한 Dart의 경우 저장을 하는 순간 알아서 자동 포맷이 될 겁니다.
Google에서 개발한 Go 언어 등도 마찬가지로, 자체적인 자동 포매팅을 지원합니다.
정리
지금까지 Code Formatter를 쓰는 이유와, 각 언어별 유명한 Code Formatter가 무엇이 있는지에 대해서 알아보았습니다.
글에서 소개된 각 언어별 Code Formatter는 다음과 같습니다.
- C++
- Clang-Format
- Python
- black
- YAPF
- PyInt
- JavaScript
- Prettier
- Dart
- Dart Formatter
위에서 소개된 언어 외에도, 각 언어별로 Code Formatter는 존재할 것입니다.
중요한 점은 각 프로젝트에 맞추어서 어떤 코드 포매터를 도입할 지(아예 안 도입한다는 건 말이 안 됩니다! 최소한 IDE나 Editor 자체의 포매터 기능이라도 이용합시다!) 어떤 세팅을 적용할 지 적절하게 의논해서 적용해야 합니다.
📚 References
- Clang-Format Style Options, llvm
- ClangFormat, llvm
- Clang-format Comparison, andrewseidl
- 모던C++, clang format, 코드 포매터, 코드없는 프로그래밍
- PEP 8 – Style Guide for Python Code, python.org
- Black 23.7.0 documentation, black
- 파이썬 코드 스타일(pep8)을 Black으로 자동 포맷팅하기, 조은우 개발 블로그
- Pycharm Black 설정 및 사용법 가이드, 카프리썬
- Partial Python code formatting with Black & PyCharm, godatadriven
- Google Python Style Guide, google
- pyink, google
- yapf, google
- 핑퐁팀의 Python 문화 구축기, 정욱재, 홍승환
- Prettier documents, prettier.io
- 코드 포맷팅은 그냥 Prettier에게 맡기세요, Daleseo
- 타이터스 윈터스. (2022). 구글 엔지니어는 이렇게 일한다. n.p.: 한빛미디어.